
Filtering the Case List
The Case List can be filtered to only display the cases that meet certain criteria specified by the user. A filter does not delete any cases from the database; it simply allows the user to control which cases are shown in the Case List. This would be very useful when working with large case lists because it allows the user to work on a few cases at a time. For example, a filter could be created for cases that are classified as “Proved”. By default, there will be No Filter applied and the case list will display all of the cases in the current scenario selected.
If a filter is applied, a user cannot edit or run reports on any of the cases that are not shown. However, users can easily switch filters to work on the other cases in the database.
To create, switch, or manage filters, go to the the Home Ribbon on the Case List Section:

To Add a New Filter
1.Go to the Home Ribbon on the Case List Section.
2.Click on the drop-down menu next to Filters and choose choose Add a New Filter.
3.Fill out the information on the top right part of the Filter Cases window including:
•Filter Name – which should describe the filter criteria to distinguish it from other filters.
•Groups – the grouping the filter name will be categorized under on the left-hand side showing Saved Filters. Available groups are: Display, Economics, General Purpose, and Reports.
•Access – choose whether this filter will be public for everyone to use but only you can edit it, private for just you to see, or ‘all’ which means usable and editable by anyone.
•Description – (optional) this is where a user provides more details about the filter being created to make it easier to keep track of filters and for other users to understand the purpose of the filters.
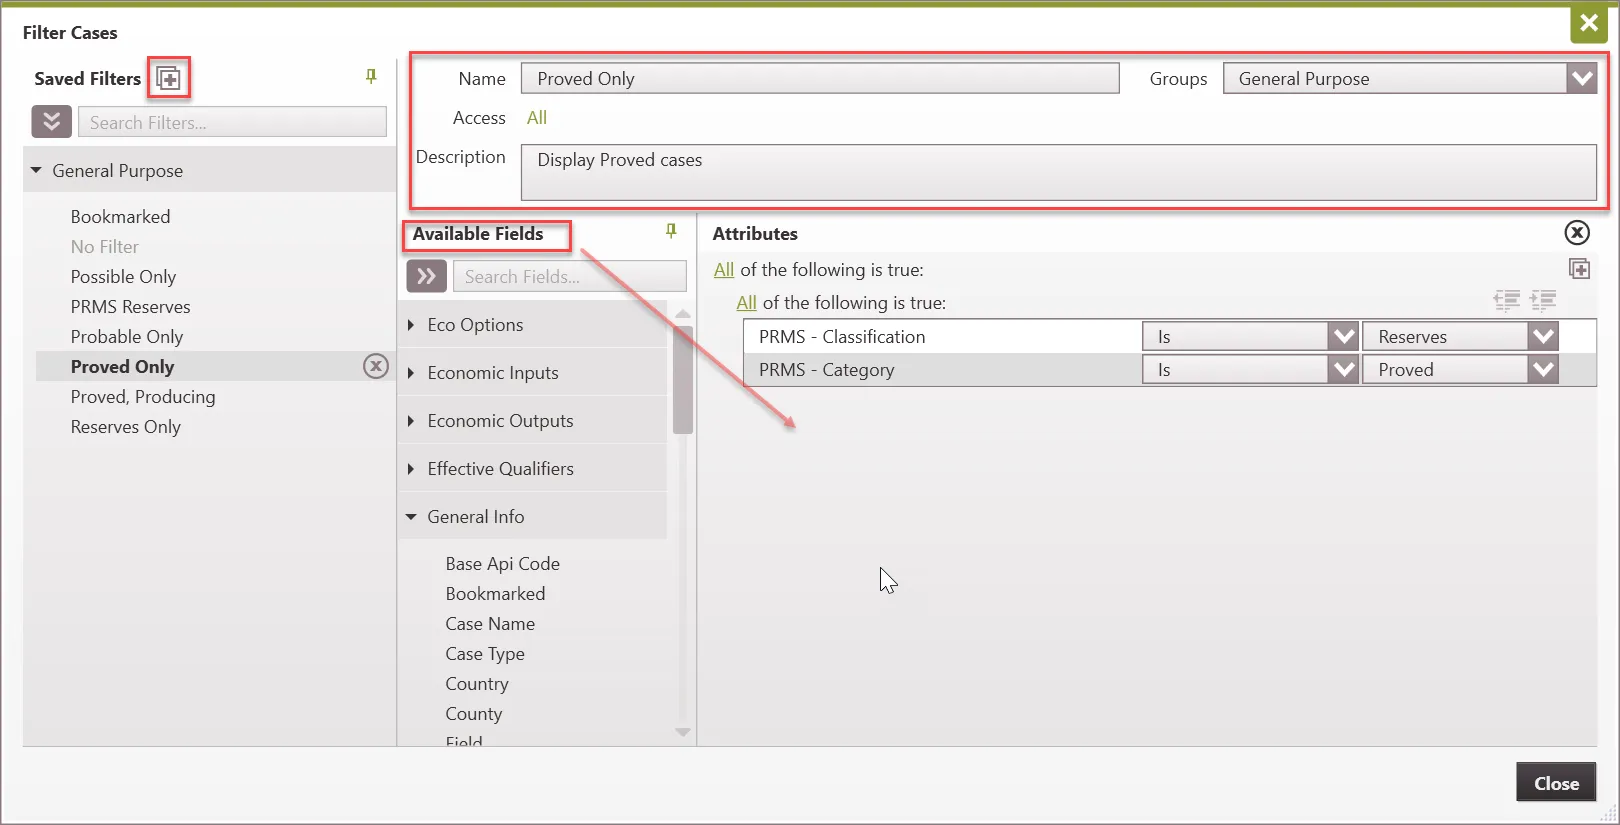
4.Select the fields to filter by and add those fields by dragging them from the Available fields section into the Attributes section as shown above.
5.Click on All or Any to toggle back and forth between the two:
•All – choosing All means that all of the conditions below this level MUST be true.
•Any – choosing Any means that at least one of the conditions MUST true.
6.Select an operator for the chosen conditions (options are: Contains, Not Contains, Begins With, Ends With, Is, Is Not, Is Empty).
7.Enter the text for the filter criteria or make the appropriate selection using available drop-down menu.
8.To add multiple conditions, drag over more available fields or use the ![]() button that will appear when you hover over the very top line of the filter.
button that will appear when you hover over the very top line of the filter.
9. Use the ![]() buttons to move level to be a subset of another condition or standalone.
buttons to move level to be a subset of another condition or standalone.
10. Click Close to save the changes and apply the filter.
The case list also shows differences in wells without the need for a filter based on the color they are in the Case List. For example, a case highlighted in red means that the major phase is gas, while a case in green indicates that the major phase is oil.
To Switch or Turn Off the Filter
1.Go to the Home Ribbon on the Case List Section:
2.Change the Filter drop-down to No Filter or any other filter listed.

To Edit, Copy, or Delete a Filter
To copy an existing filter
1.Go to the Home Ribbon on the Case List Section.
2.Click on the ![]() button next to filters. This brings up the filter window.
button next to filters. This brings up the filter window.
3.Highlight the filter on the left to copy it.
4.Click on the ![]() buttons at the top and choose the one labeled Copy Selected Filter. This copies the selected filter. Modify it as appropriate, rename it, and close to save changes.
buttons at the top and choose the one labeled Copy Selected Filter. This copies the selected filter. Modify it as appropriate, rename it, and close to save changes.
To edit the current filter
5.Go to the Home Ribbon on the Case List Section.
6.Click on the ![]() button next to filters. This brings up the filter window.
button next to filters. This brings up the filter window.
7.Click on the filter on the left to edit and make any changes by adding or deleting filter fields. Close the filter window to save changes.
To delete a filter
1.Go to the Home Ribbon on the Case List Section.
2.Click on the ![]() button next to filters. This brings up the filter window.
button next to filters. This brings up the filter window.
3.Find the list of Saved filters to the left – click on the ![]() button next to any filter to delete it.
button next to any filter to delete it.