
Creating SQL Logins & Permissions
Setting Up a Shared SQL Server Instance
If you are the PHDwin user and have installed a local instance of Microsoft SQL Server where you are the system administrator, then your setup is complete and you don’t have to read any further in this section.
If you are part of an IT team installing PHDwin and SQL Server for the PHDwin user, you will need to create a SQL login for the PHDwin user. If the SQL Server instance was installed on a shared network location for multiple users to access, you will also need to enable TCP/IP & Named Pipes connections. All of the PHDwin users must be using the same build number of PHDwin to access a shared instance.
Adding a Login to SQL Server
If multiple users will be logging into a shared SQL Server Instance for PHDwin, it is recommended to create a domain group that contains all PHDwin users in order to save time managing permissions for the individual users. Each domain group or individual PHDwin user must be added as a login for the SQL Server using SQL Server Management Studio.
To Add a New Login
1.Open SQL Server Management Studio and connect to the instance you’ll use to store PHDwin databases. The server must be a part of the domain that you created the group on.
2.Expand Security to find the Logins – right-click on Logins and select Add New.
3.Click on the Search button next to the Login name to search for the group that you created. This will open a new window.
a.Click on Object Types and make sure that Group or User is selected.
b.Make sure the location underneath “From this location” is set correctly. You may need to click on the Locations button to choose the network that the group/individual is a part of.
c.In the section that reads “Enter the object names”, type in the name of the group or user and click Check Names.
d.The name you were searching for should show up with the text underlined. Once you see this name, click OK to close the window.
4.Underneath the login name, you will choose the authentication method – Windows authentication or SQL Server authentication which allows you to specify a password for the login.
a.If you select Windows authentication for a group login, the domain will know which users belong to any groups you’ve created and allow them to log in with the permissions for the group.
b.If you select SQL Server Authentication, you must create a Username and Password for the PHDwin user. Uncheck “User must change password at next login” as this action cannot be performed from the PHDwin login screen.
5.Go to the Server Roles page.
.By default, the login will have a public server role.
·If you are creating a login for a PHDwin user on their local instance, click the box for the sysadmin server role. This will enable them to create databases in PHDwin, make changes, and delete them if necessary.
·If you do not want to make the user a sysadmin, view the section below on limiting SQL permissions.
·To give full SQL permissions to someone in an instance without being sysadmin is to give them the role of dbcreator. Apparently, no other role will have restore permissions without being explicitly granted on a per-database basis.
6.Click OK to save your changes.
SQL Permissions
To set the minimum SQL login permissions for each user or domain group accessing PHDwin on a shared SQL Server instance:
1.Open SQL Server Management Studio and connect to the instance you’ll use to store PHDwin databases. The server must be a part of the domain that you created the group on.
2.Expand Security to find the Logins
3.Right-click on the Login that will be assigned permissions and select Properties.
4.In the Login Properties window, go to the Securables page
5.Under the list of Explicit Permissions, click the Grant box next to the following permissions:
a.Alter any database
b.Connect any database
c.View Server State
6.Go to the User Mapping page.
7.Click the Map box next to the following databases:
a.PhdDefaults
b.PhdReports
c.PhdRules
d.PhdUsers
e.Any user-created databases which the login will need to access. These databases will all have the Phd_ prefix.
8.Click OK.
9.Expand Databases to see full list of databases in the SQL Instance. The database level permissions for the login must be specified for each database mapped in step 7 above.
10.Under each database, expand the list to find the Security section.
11.Under Security, find the Users section and expand it to find the login you re modifying.
12.Right-click on the Login name and select Properties.
13.Go to the Securables page.
14.Click Search
15.Select All objects of the types and click OK.
16.Select Databases and click OK.
17.Click the Grant box to assign that permission to the login. Refer to the chart below for the minimum permissions required for using PHDwin.
18.Click OK to save your changes.
19.Repeat these steps for each database.
Enable TCP/IP and Named Pipes
If you have installed SQL Server on a network server and you or other users will need to connect to it, TCP/IP and Named Pipes connections must be enabled.
To Enable TCP/IP and Named Pipes
1.Start SQL Server Configuration Manager you can search for this app in the Windows start menu.
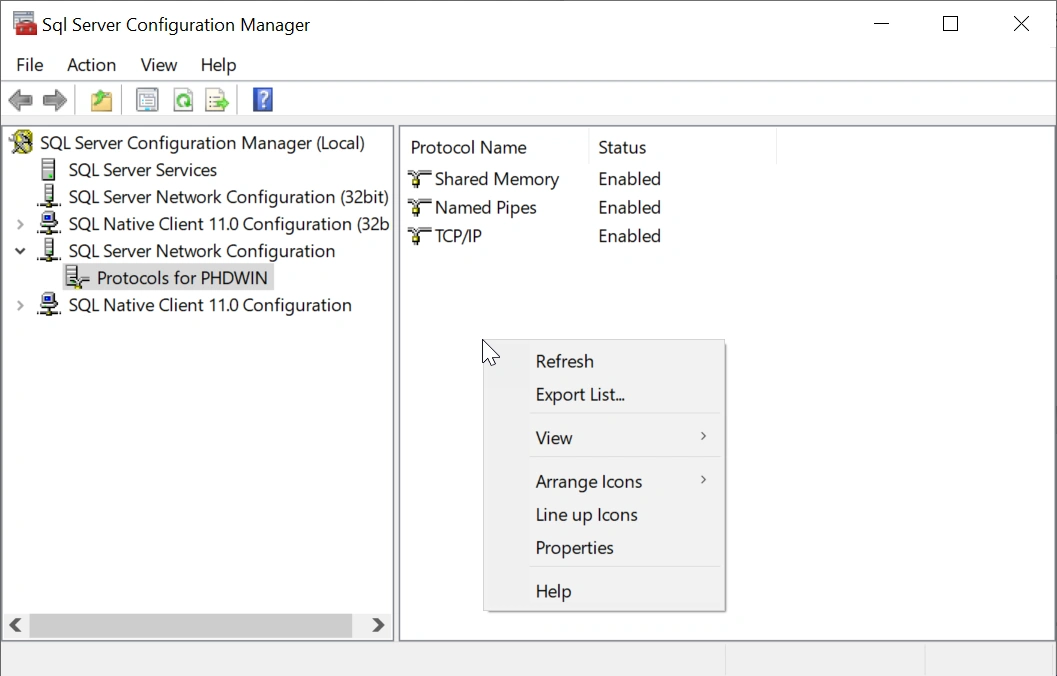
2.In SQL Server Configuration Manager, in the console pane, expand SQL Server Netwocrk Configuration.
3.In the console pane, click Protocols for <instance_name>.
a.In the details pane, right-click TCP/IP, and then click Enable.
b.In the details pane, right-click Named Pipes, and then click Enable.
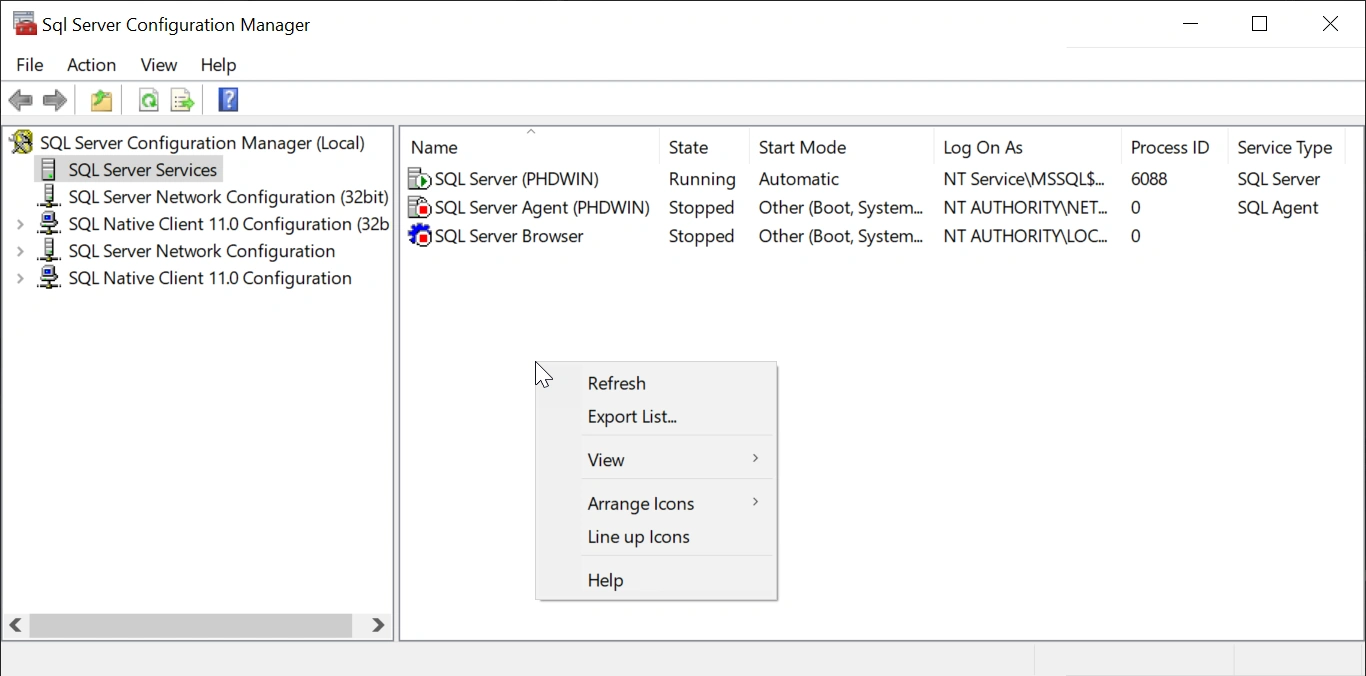
4.In the console pane, click SQL Server Services.
a.In the details pane, right-click SQL Server (<instance_name>), and then click Restart, to stop and restart the SQL Server service to apply the changes.
Setting Up a Group on the Domain
You can save time setting up SQL Server logins by creating a security group using Windows Active Directory Domain Services. The group should contains all PHDwin users. That way, when the security group is given access to an object(such as the PHDwin server), all members of the security group automatically receive the same access to the object.
To create a domain group:
1.Log in to the server with the domain controller – the instance of SQL server used by PHDwin must have access to this domain controller.
2.Open up the Active Directory Users & Computers. This is found by opening Administrative Tools>Active Directory Users and Computers.
3.Find the domain that you would like to add the group to and expand it to find the Users grouping. Right-click on Users and select New>Group.
4.Give the group a Name and select the Group scope & group type. The group type should be “Security”, the group scope will typically be “Global” but may depend on the rules & requirements of your company. Click OK to save the group.
5.Find the group that was created in the list of Users, right-click on it and choose Properties.
6.Click on the Members tab and then click on the Add button to add the first user to the group.
a.Under Select this object type, click on Object Types and make sure “Users” is selected.
b.Under From this location, make sure you are on the domain that you’d like to add users from. Click on Locations button to change this
c.Type in all or part of the name of the first user that you’d like to add, and click on Check names. The user name should pop up, select it and hit OK.
d.Repeat this process for all of the PHDwin users that you’d like to be a part of this group.
7.Once you are finished adding users, click OK to save your changes.
More information on domain groups, including settings and adding or removing members can be found on Microsoft’s website msdn.microsoft.